|
Coordinator Rods
by Laurie Grundy of ‘Grundy Banjos’
visit: www.grundybanjos.com
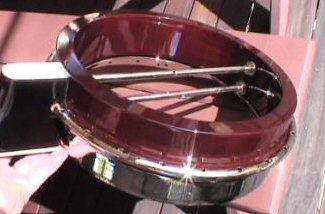
Coordinator rods are pretty easy to figure out if you think about the principles.
- They both attach the neck to the body ......wooden rim and tone ring ... "the pot". They should be reasonably firm and snug on the neck's lag bolts otherwise tone and volume will be sacrificed. Make sure there are washers on the inside of the rim ... never tighten so hard that the washers crush into the wooden rim. ... the main thing is to have a good relationship between the neck and the pot to enable the best transfer of vibrations through the pot into the neck wood.
- The Upper rod (one immediately under the head) .....Many older banjos including Gibson RB 100's did not have an upper c/rod .. just a nut and washer to attach the neck via the lag bolt.
- The Upper rod does not play a role in action adjustment ...is there to simply tighten neck to body ... BUT IT sure has a role to play with tone adjustment .... the nuts on both the top and bottom c/rods have an affect on tone. (I'll explain later here).
- The bottom coordinator rod attached to the neck's lag bolt should also be tightened snug and firm without being over tight there. The bottom c/rod is the one to adjust your action higher or lower this occurs at the tailpiece end of the rod.... to lower action .... you should first loosen off the inside nut then tighten the outside nut until you notice the action lowering ... do the reverse for raising the action.
- At the tailpiece end of the banjo the Nuts on the c/rods on a good banjo well built banjo should not need be tightened any more than finger tight and then just a nip more to prevent them from vibrating loose and buzzing around. This applies to the inner nut on the top rod and the inner and outer nut on the bottom rod.
- So now your asking why have the rods if they should be just finger tight.... A good well built banjo is one that has the neck angle at the heel already cut and fitted to the rim and tone ring so as the action is perfect to begin with without the need to adjust the bottom coordinator rod for action. When you do adjust this rod the action is raised or lowered by deflecting the whole pot. In fact what is happening is the pot is going oval shape, by degree to obtain the action. In the old days nobody bothered about this too much but over time people have discovered that by putting that kind of pressure on the pot (rim and tone ring) that the tone is affected to a large extent because the whole pot is so stiff and deadened and consequently will freeze the sound output put of your banjo.
When this kind of pressure is on the pot it reduces it's ability to vibrate freely ... much like someone grabbing a bell after it's been struck which deadens the vibrations. If you want to have a good open sound and not a frozen, stiff and quieter sound then the pot should be permitted to vibrate freely without being under pressure.

Clarification: In descriptions of 'lower co-ordinator rod' and 'upper co-ordinator rods' the one you're looking at when the resonator is off and it's upside down (ie, tone ring on your knee) is the lower rod.
|
Getting back to the top c/rod at the tailpiece end .... if your banjo sounds ringy with lots of nasty overtones that you want to eliminate you could try tightening the nut in against the rim a little more than finger tight to see if it will get rid of them.... what happens is that the tightening can get rid of over tones or ringiness and the fundamental note is more obvious because it is not surrounded by as many overtones thereby giving the affect of a bonier or more solid sound. What occurs when you do this is the nut pushes the rim harder against the tone ring and reduces its ability of ther tone ring and the rim to vibrate as much.
So therefore sometimes with banjos that have a very sloppy fitting tone ring it can be good to tighten the inner nut until the rim makes contact with the tone ring to reduce unwanted overtones. And now we are getting into another important area over banjo technology ... that is that the tone ring should also not be too tight on the rim ... which also makes for a stiff frozen spiky sound with barely any overtones at all ...or it should not be so sloppy & loose with overtones running rampant so that when you play quickly the notes sound like they are running into each other making for real mushy loud but gutless sound.

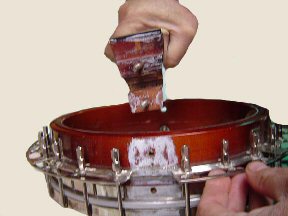
This is a bad match - the paste has not made contact with part of the heel.
|

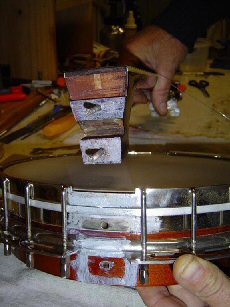
Now correctly chiseled. At the lag bolts end of heel - the only part that should have contact is above and below the flange. Heel should not contact the flange or tension hoop rebate.
|
So the ideal situation:
- Tone ring fitted to rim with a beautiful slip fit ...tone ring fitted while rim machined to size on the lathe on a humid day. Also good fit of the flange & best fitted while rim being machined ... trial & error for neutral pressure against walls of rim.
- Neck heel cut for ideal action by the luthier ... to avoid necessity to employ rods for action.
- Neck fitted snugly to coordinator rods.
- At tailpiece nuts on rods finger tight plus a nip
With this scenario the banjo is then allowed to breath nicely!
|


